Showing posts with label Drawing and Painting Beautiful Faces. Show all posts

Wednesday, July 8, 2015

Week 24 - Weekly Art Challenge - Faces

This week I continued working with Jane Davenport's Drawing and Painting Beautiful Faces,  This week the exercise worked with "latitude and longitude". Davenport treated her simple faces (or Draw Happy faces) as globes with latitude and longitude lines. Using these as guidelines makes it easier to draw faces that are tilted, rather than looking straight on. These are my results, with the "globe" I used as a guideline in the lower right-hand corner.

3/4 view - 4"x 4", Pencil on mixed-media paper.

Tilted up, 3/4 view - 4" x 4" - Pencil on mixed-media paper

Tilted down-3/4 view - 4" x 4" - Pencil on mixed-media paper.
Tilted up - 4" x 4" - Pencil on mixed-media paper.

These has been an eye-opening experience for me. I had never thought of thinking of the faces as a globe and using latitude and longitude lines to determine the placement of the facial features. Even though these are fairly rough sketches, I learned much creating these. The next section of the book starts working on the details of facial features. It's exciting to think I can start getting a fairly realistic looking face without working directly from a photograph.


Keep creating!!
Lynnita


Friday, June 26, 2015

Week 20 - Weekly Art Challenge - Faces

For this Weekly Art Challenge, I worked on the next exercise in  Jane Davenport's Drawing and Painting Beautiful Faces. (See previous posts here). Jane described drawing and shading spheres; then explained how the face can be represented by spheres to help create dimension with shading. Working with the "Draw Happy" faces, she added spheres for the cheeks, nose, chin and lips.  These are the two faces I did in this style. 

"Baby face" - 4" x 4" - charcoal and 0.005 black Sakura micron pen on mixed-media paper.
In this sketch, I started with the guidelines and eyes. I added spheres for the nose, lips, chin, and cheeks. After adding the shading, I saw a baby's face, so added just a few tufts of hair.

"Young girl" - 4" x 4", charcoal and 0.005 black Sakura micron pen on mixed-media paper.
Again, I started with the guidelines and eyes, adding spheres for the various facial features. This young girl still needs work, but I think I got the concept Jane was illustrating with using spheres to help add dimension to a face.

I'm enjoying Jane's book and learning more about how to draw faces. However, for me, it's tough to get a good face without a photograph.


Keep creating!
Lynnita


Friday, April 17, 2015

Week 15 - Weekly Art Challenge - Faces

This week for the Weekly Art Challenge, I've been working from Jane Davenport's Drawing and Painting Beautiful Faces. I enjoy creating portraits and want to be able to create faces better and use them in mixed-media artwork and also to create portrait paintings. I've done a few faces in past blogs posts (see posts here).

This week I did the exercises for "the Hot Zones" and "Jane-style whimsical proportions."  In the hot zones, Jane explains the distance between eyes, the stack of the nose, mouth and chin, how the lips line up with the eyebrows,  how the ears line with our facial features, and finally, the curve of the cheeks. In whimsical proportions, Jane shows how the proportions can be played with for drama and to look for what we find interesting and aesthetically pleasing.

These are the "whimsical  proportions" I focused on this week, while using the "hot zones" to keep the drawings balanced and proportionally pleasing.


Realistic Proportions, 3"x3", pencil and pen on mixed-media paper
Jane-style Proportions, 3"x3", pencil and pen on mixed-media paper
Fey, Tilted Eyes,, 3"x3", pencil and pen on mixed-media paper
Pixie, Large Wide-Set Eyes, 3"x3", pencil and pen on mixed-media paper
Feline, Large Eyes, Bunched Features, 3"x3", pencil and pen on mixed-media paper
Hollywood, Large Lips, Small Noses, 3"x3", pencil and pen on mixed-media paper
I think I still need some work on the faces, but playing with the proportions and placement of the features is a learning experience. It was interesting to see how varying these elements affects the way the face looks. It also helps me to know that I do not have to have realistic proportions all the time when working with portraits - they just need to be balanced and pleasing. Thanks, Jane!


Keep creating!
Lynnita


Monday, April 13, 2015

March ATC Challenge - Fairy Tales

It's been a couple hectic weeks. I'm running behind in posting again! Someday, I'm going to figure out how to help my daughter and son-in-law with their special needs daughter, taking her to several doctor's appointments, babysitting my other grandchildren, posting photos of all the grandchildren for our Ohio family on facebook, continue creating artwork and quilts, while finding time to post on my blog!! I'm not sure how young mothers do it all!!  I was doing fine until our special granddaughter was born prematurely. Since then, I've been struggling to post at all, let alone in a timely manner! Lol!!

Today, my goal is to get a few posts completed that I should have posted in the last couple of weeks. First is Blue Twig Studio's ATC Challenge for March, which was Fairy Tales.  I have loved fairy tales since I was a child. Two of my favorite books as a child were Grimm's Fairy Tales and a book of tall tales and fables that my parents gave me for Christmas when I was 8 years old. I still treasure those books. I've been a science fiction and fantasy reader ever since!

The first card I created was "Elfin Maiden". I used Dylusions Ink Spray through a flower stencil on watercolor paper. After it dried, I blocked in a face with white paint. I used Derwent watercolor pencils to create the face and outlined details with a 0.1 black Sakura Micron Pen. The face was created with inspiration from Jane Davenport's book: Drawing and Painting Beautiful Faces.
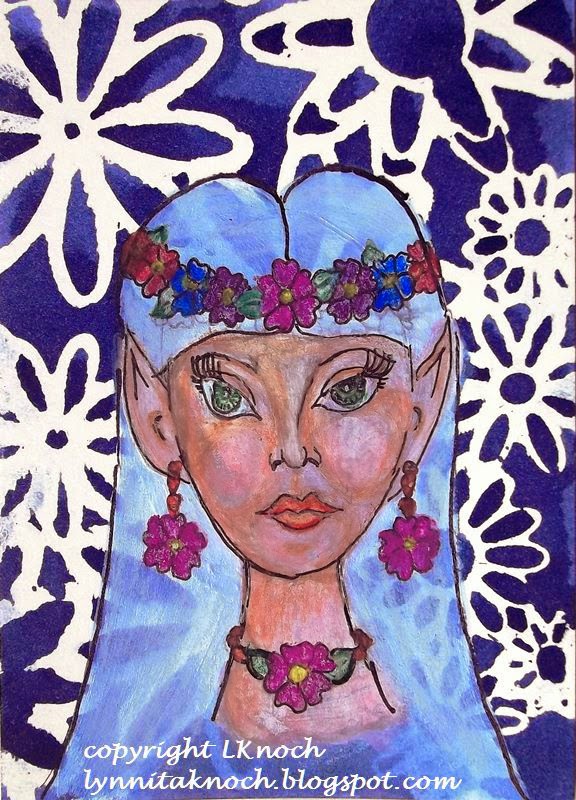
Elfin Maiden, 2 1/2" x 3 1/2", watercolor and inks on 140lb watercolor paper 
I love dragons and collect dragon figurines. The past year (if you've followed my blog), I worked through the exercises from a book on drawing dragons by J. "Neon Dragon" Peffer. This ATC card, The Reading Dragon, was inspired from one of her books. I painted the background with acrylics. After sketching in the dragon, I painted him with Derwent watercolor pencils and acrylics. I outlined with a 0.2 black Sakura micron pen.
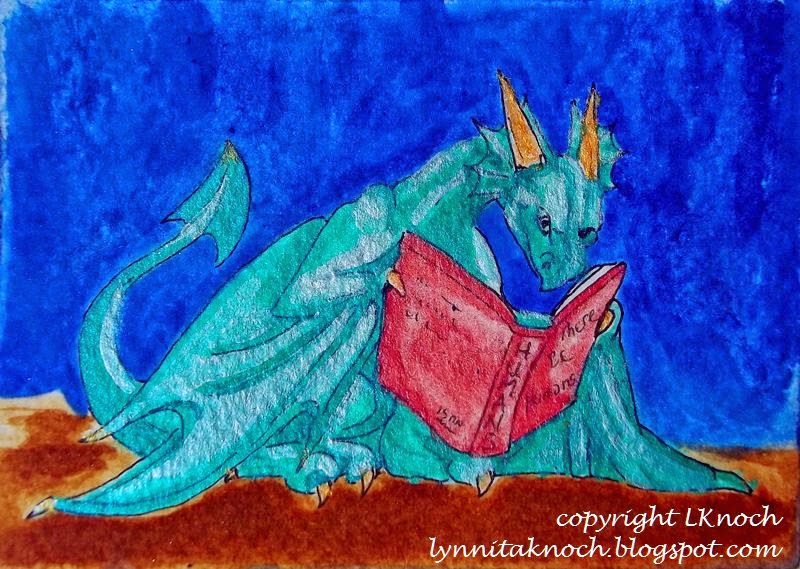
The Reading Dragon, 3 1/2" x 2 1/2", acrylics and watercolor on Bristol paper.
The final card is a prancing unicorn. My daughter told me I needed to make a unicorn, when I had been thinking about Red Riding Hood. The unicorn won out! With help from a book on fantasy creatures by J. "Neon Dragon" Peffer, Dragonart: How to Draw Fantastic Dragons and Fantasy Creatures, I created this proud unicorn.  I sketched in the unicorn and painted him with acrylics and Derwent watercolor pencils. I outlined him with a 0.2 black Sakura micron pen. I used watercolors to fill in the background.
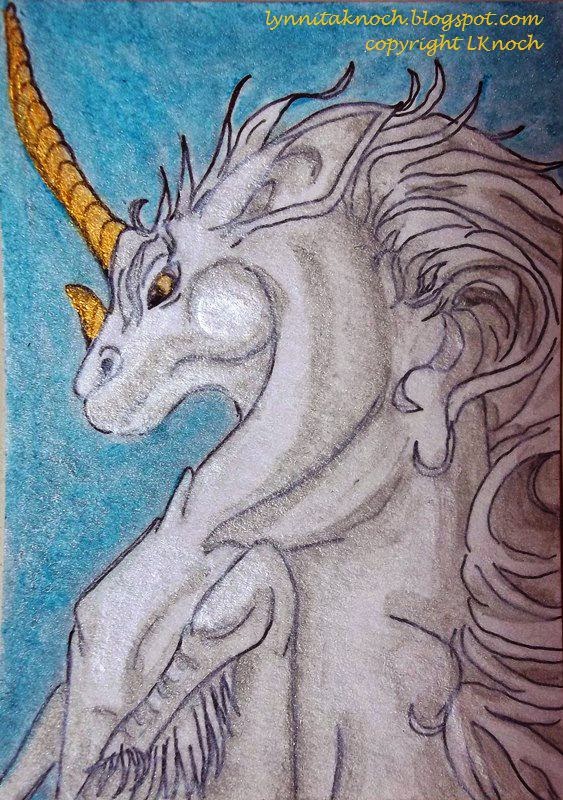
Prancing Unicorn, 2 1/2" x 3 1/2", watercolor and Sakura pen on Bristol paper.
I enjoyed this month's ATC challenge! I hope you join the group next month! You only need to make one ATC card. They are only 2 1/2" x 3 1/2" in size, so it doesn't take a huge commitment to create this size artwork. It's fun, challenging, a great time to experiment. And you might win!!

Whatever you decide, have fun with your artwork and experiment!


Keep creating!
Lynnita


Monday, February 23, 2015

Week 7 - Weekly Art Challenge - Faces

Trying to catch up on my weekly art challenge posts. Our grandbaby is home from the hospital, my hand is healing from my hand surgery (my dominate hand, of course!), so I'm trying to get settled into creating again! Although, in the 4 days our grandbaby has been home, we've babysat two days and the other two days, I had to take her or her mother to routine check-ups! I'm not complaining about the babysitting - she is such a joy! She's so quiet, I can almost forget she's here! I'm hoping as our daughter and her boyfriend adjust to being new parents, things will settle down some. However, they may be moving in with us in a month, if they cannot find another apartment! LOL! life is always changing!

This week, I still haven't gotten back to my painting. I did do another drawing from Jane Davenport's book: Drawing and Painting Beautiful Faces. I had started the first couple of exercises before all the excitement with a new baby (see posts here).  The next exercise is called "Grand Scale". Instead of the small, simple "Draw Happy" faces, this exercise scaled the drawing to a full page. She goes into more detail of placement of facial features and shape of the face. This is my result:

Face, 7" x 10", pencil and 0.005 black Sakura pen on mixed-media paper.
I like the facial features, although the eyes are too large and too close together. The hair and neck need some work, but those weren't the focus of this exercise. I do pretty well doing portraits from a photograph (I've actually done commissions in oils, acrylics, and colored pencil),  but to draw a portrait without a photo to look at is such a challenge for me. I'm hoping Jane's book (and I also bought her video recently) will help me to overcome these difficulties.

I hope for Week 8 to be able to finally start painting in my art journal for the Documented Life Project 2015 (DLP) with Art to the 5th Academy, that I originally set out to do for my weekly art challenge this year! I'll see what this week holds!


Keep creating!
Lynnita


Saturday, January 17, 2015

Face Sketching continued

I am continuing to work on faces using Jane Davenport's new book "Drawing and Painting Beautiful Faces" (see last week's post here) to improve my portraiture skills.

After drawing simple, little "Draw Happy" faces for the first exercise, Davenport moves to adding guidelines to help place features on the face with confidence. The eyes are about halfway between the hairline and the chin, while the bottom of the nose is about halfway between the eyes and the chin, with  the mouth about halfway between the nose and chin. The ears sit between the eyes and nose.  All sketches are approximately 3" x 3" and use a pencil, 0.005 black Sakura micron pen, and a white Uni-Ball Signo gel pen.

Simple face with guidelines showing placement
 of the eyes, nose, mouth, and ears. 
Davenport calls this Divide and Conquer! She says although there is a huge amount of variety in every face, the guides will work on any face shape and by sticking to these basic placements, the face will look balanced no matter what face shape is drawn. The exercise was to create a series of different shapes and draw simple faces onto them using these guidelines. (I did not completely erase all of my guidelines.) 

Circle base for the face.
Oval base for the face.
Square base for the face.
Rectangle base for the face.
Heart shape for the face.

These guidelines are a huge help with creating a face that looks realistic, although they are still simple faces. I only added a bit of shading to create depth. I added simple hairdo's - I wasn't concerned if they looked real - since I was mainly concerned with creating a symmetrical, somewhat, realistic face. The next few exercises start going into more details for creating a larger face - where getting facial features placed right will matter more.

I have a hard time creating a face that looks real from my imagination (that is not drawn by using a photo or looking at someone), but I'm already feeling more comfortable from just these first two simple exercises.  I think I'll soon be ready to add faces to mixed-media work and art journaling. 


Keep creating!
Lynnita


Saturday, January 10, 2015

Face Sketching

I recently picked up a new book by Jane Davenport called "Drawing and Painting Beautiful Faces: A Mixed-Media Portrait Workshop."  I had to skim the entire book the day it arrived. She draws such beautiful, whimsical faces.

Drawing and Painting Beautiful Faces by Jane Davenport 
Drawing and Painting Beautiful Faces back


When I took my first art classes several years ago, my instructor talked my into trying portraits, kicking and screaming the whole way! But I found out that I really enjoy creating portraits. Since then, I have done portraits in oil and colored pencil, and for commissions. I did these working from photos. I find it harder to draw a face without something to look at and have been wanting to get better at drawing faces for some time now. So when I saw her book online, I just had to pre-order it and it arrived a couple days later!

I stayed up until the middle of the night dong several faces for her first exercise called "Drawing Happy". These are little, simple "Draw Happy" faces that she gives about 10 step-by-step instructions to complete. Following these instructions I made about a dozen "Draw Happy" faces, approximately 2" x 2" in pencil, 0.005 black Sakura micron pen, and white Uni-Ball Signo gel pen unless stated otherwise.
Face #1 
Face #2 - Also used 0.005 red and sepia Prismacolor pens.
Face #3
Face #4
Face #5
Face #6 - Also used 0.005 red Prismacolor pen
Face #7
Face *8
Face #9 
Face #10
Face #11
Face #12

As you can see, my faces improved the more I drew. I like the last 3 the best. I can see the point of Davenport's exercise - the more you draw, the better you become! With drawing small faces, I could draw several in a fairly short period of time. These aren't meant to be detailed, realistic faces - just small, simplistic representations.

I'm looking forward to continuing to do the exercises in Davenport's book. She goes into more details in drawing faces that look more realistic, yet whimsical and she uses a variety of media - including pencil, pens, colored pencils, pastels, acrylics, watercolors, inks, etc. to accomplish the various drawings. Fun, fun, fun!! I also want to use these in my art journaling.  I used one of Jane Davenport's face stencils in my December project as a design team member for Blue Twig Studio. I hope to be able to draw my own whimsical faces, in addition to using the stencils, for various mixed-media, quilting, or drawing projects in the future.


Keep creating!
Lynnita