Showing posts with label Photoshop Elements. Show all posts

Saturday, January 10, 2015

Week 1 - 2015 Weekly Art Challenge

I want to continue doing a weekly challenge this year, but it's taken me awhile to decide what I wanted to do. I thoroughly enjoyed Blue Twig Studio's weekly sketch challenge last year and want to do something again this year.  I can see in looking over my sketches from last year's challenge (see posts here), that taking time to sketch weekly helped me improve my skills. Also, it was also a lot of fun! I enjoy creating Zentangles, too, and thought about doing these daily, with a weekly sketch thrown in. Even though a Zentangle can be created in a short amount of time, I was afraid it would be more than I could realistically accomplish when I examine everything else in my life at this time.

Another weekly challenge I had thought about participating in was a weekly photography challenge that would help teach photograph skills and editing photos. I would love to improve both of these areas. However, I don't have the required DSLR camera or Adobe Photoshop and can't afford either of them currently.  So that challenge is out for now.

Lastly, another area I want to improve is my mixed-media skills. I found an online challenge for a 52-week art journal called  the "Documented Life Project 2015" (DLP) at Art to the 5th Academy. They will be giving a prompt every week to create an art journal page. I thought this would help me explore my art journaling more, as well as, be fun to do.

After much thought, I've decided to to the Documented Life Project (DLP) 2015 with Art to the 5th Academy for my weekly challenge.  I'm going to be behind one to two weeks, as I'm waiting on my Dylusions Creative Journal to arrive via mail. It was supposed to be here in 2 days, but so far it's been almost 10 days. Hopefully, I can catch up in a short amount of time once the journal arrives. In addition to the DLP, I will post my sketches, drawings, Zentangles, photos and digital artwork as I create them - I am just not going to commit to having these done on a weekly basis.

With all that long explanation now out of the way, since I can't start the DLP without the art journal, this first week I worked on some digital artwork. I used Pixlr Express to create the following digital artwork made up of blended photos or photos and drawings. I took all of the photos myself and drew all the drawings. I hope to print some of these on paper and use in my art journal once it arrives!
Photo of a rose with the morning dew (see post dated May 21, 2014) blended with a photo of a palm frond. Both photos taken  at Vina de Lestonnac in Temecula, CA, May 2014. The palm frond creates an interesting texture across the rose and rosebud. Overlays added more color to the background.

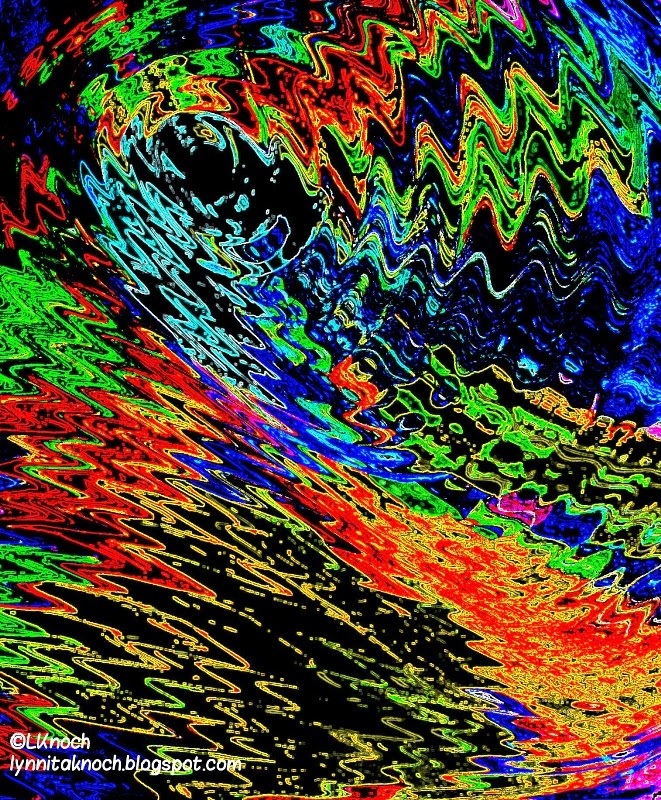
Photo of winter berries covered in ice blended with a photo of a funny looking tree in the middle of a river. Both photos taken  in Toledo, OH after a snow storm on Dec 6, 2011. Overlays added the bubble texture, while the red lines bring focus to the berries and tree. 
Photo of the winter berries covered in ice (taken in Ohio, Dec 2011) blended with the photo of the palm frond (taken in CA, May 2014). I like the contrast of the radiating straight lines from the palm frond with the round berries and organic shape of the ice covering the berries. Overlays added more color to the background.
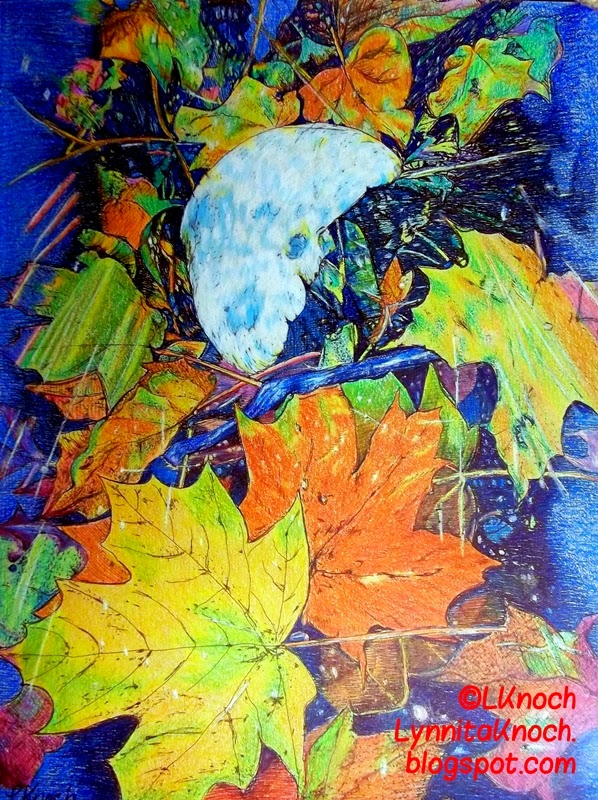
Photo of a carpenter bee blended with a photo of a yellow flower. Carpenter bee taken in Chandler, AZ  (see post dated Mar 20, 2013). Yellow flower taken at my parents in Lima, OH in July 2013. The flowers the bee was hovering over blended with the yellow flower to create a unique background. The carpenter bee seems almost transparent. 
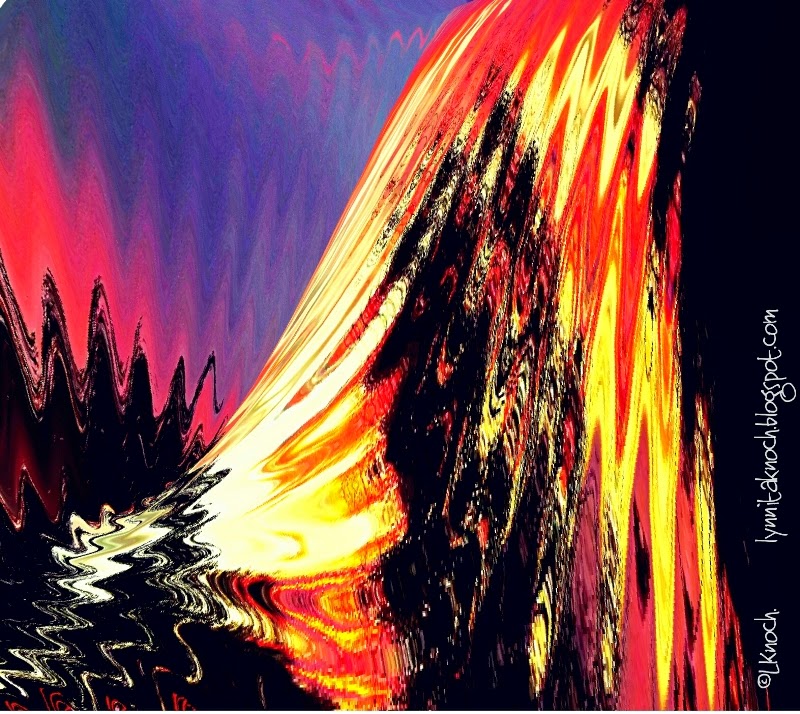
Photo of sunset blended with Dragon Rider drawing. Sunset photo taken in Chandler, AZ 
on Dec 4, 2013 and dragon rider drawing created in Dec 2014 (see post dated Jan 1, 2014). 
I cropped the sunset photo and saturated the colors to make them more vivid.
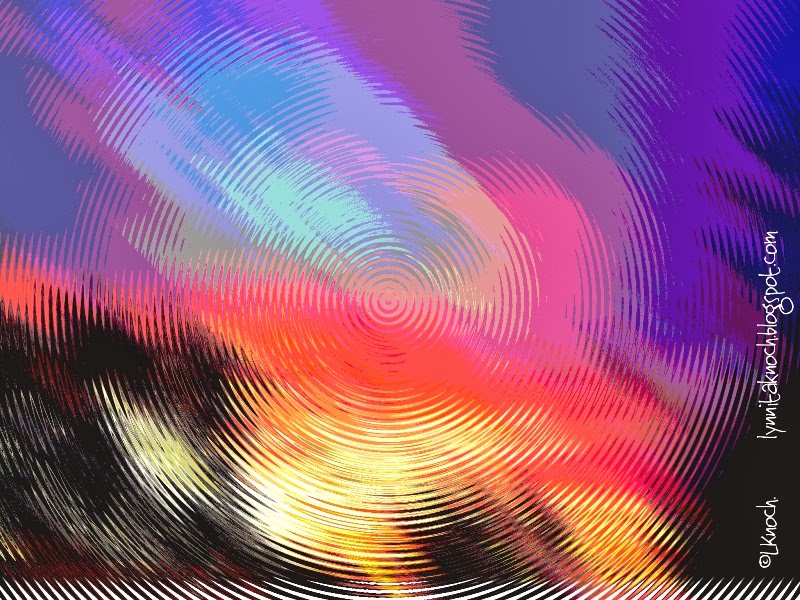
Same blended photo as above, but the blending is reversed. I like the way the reversal 
changed the colors of the sky and changed the black/white drawing into colors. It 
creates entirely different emotions than the previous digital artwork. This one seems 
more fantastical and otherworldly to me.  What kind of planet has a green sky?
Another sunset photo taken July 16, 2014 blended with a fairy dragon drawing (see post dated July 30, 2014). The colors of the dragon are almost lost in the sunset colors and he seems transparent as well. I added a bubble overlay to give an appearance of a moon behind the dragon's head. 
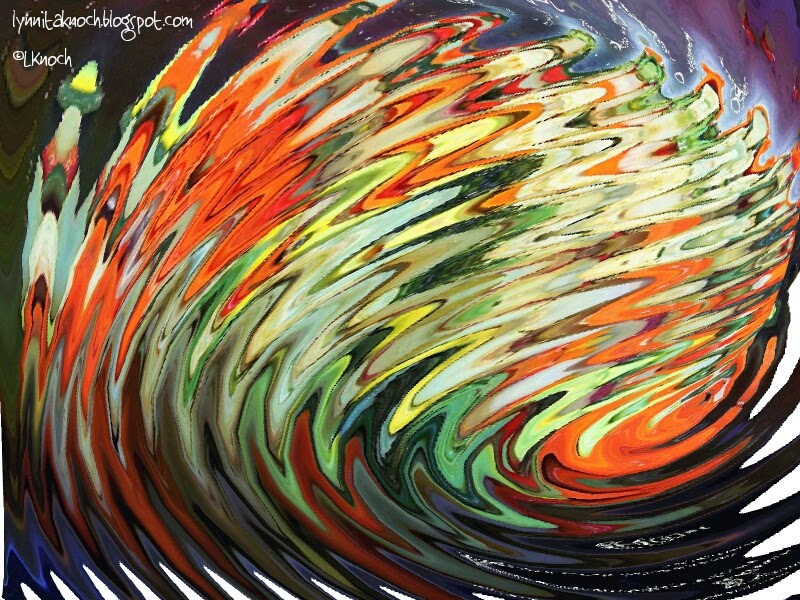
Another sunset photo taken  Sept 17, 2013 in Chandler, AZ  (see post dated Sept 18, 2013blended with Mesoamerican dragon drawing (see post dated  Jan 1, 2015).  An overlay created the starry sky. This was one of my favorite dragons to draw. I like how he appears to be soaring across a night sky, barely visible as the sun is setting and the stars are coming out. Only a select few that believe in dragons can see him!


I enjoy editing photos and playing with all the various features of the programs. The various overlays and special effects are fun to experiment with. I also like changing or enhancing the colors to create different moods with the digital artwork.  I'm beginning to feel fairly comfortable with Pixlr Express. The company keeps adding updates, such as this photo blending feature I focused on in this blog. I'm still learning all the possibilities with Adobe Photoshop Elements. I do not find this program as intuitive to use and I haven't found a good book to help with the learning curve. The company has online tutorials, but I'm always having to re-watch them. I'm learning this program slowly.

Thanks for stopping by!
Keep creating!
Lynnita


Thursday, July 17, 2014

Week 28 of 365 Days of Art Challenge

It's been an exciting week and has kept me busy enough that I didn't get this posted yesterday as planned. My daughter came over yesterday to tell me she was pregnant!! It's her first! So she's very excited, but nervous, too.

On to the 365 Days of Art Challenge - Week 28! Time just keeps marching forward! I did some more digital art this week. I worked with my Paper Camera app that I mentioned in last week's post (Week 27 of the 365 Days of Art Challenge).  I chose a photo that I took of my 2-yr old grandson playing the piano and then used the different effects available in Paper Camera to show the features of the app. 

This is my original photo - a vignette of my grandson singing while playing a small electric piano. I had planned to use a flower image, but the photo of my grandson shows off the various effects better.  
Vignette of 2 year old grandson singing while playing electric piano.
I originally edited this photo using Photoshop Elements.
 
 Following are the 14 effects available in the Paper Camera app. There are various choices in each effect (background, brightness, colors, contrast, edges, foreground, lines, saturation, quantization, shine, slickness, strokes, water, vignette)  that can be manipulated to change the final outcome of the photo. Paper Camera can take a photo to work from or use a photo already on your tablet to create digital art. I thin this app creates some interesting effects to use in digital art.

I tried to put these in a video format. The preview worked great, but every time I then saved the final version, the program would crash. The company said it's a bug in the program and they are working on it. Hopefully next time I have so many photos (especially of a series), I can put them in a video!  

Acquarello produces a watercolor effect. 
Andy Pop is reminiscent of Andy Warhol's work.


Bleaching washes out the colors.
Comic Boom creates a comic book look.

Contour creates a monotone drawing. The color can be changed. 

Gotham Noir creates a rich black and white image.

Granny's Paper produces a sepia-toned image.
Half Ton creates a dot matrix effect in color. 
Haystacks is reminiscent of pointillism (creating an image using dots of color).
Neon Cola creates an effect like a neon sign - bright, bold colors against the dark night. 

Old Printer - The image appears to have been created on an old dot matrix printer.
You probably need to be over 40 to remember the old dot matrix printers. Lol!
(I'm certainly dating myself since I remember using these printers!)  

Pastel Perfect gives the soft effect of pastels.

Pen and Ink produces a blue monotone image.


Sketch Up produces a pencil or charcoal- like drawing of the image. 


Thank you for checking out all the effects that Paper Camera can create with me. 


Keep creating!!


Wednesday, June 4, 2014

Week 22 of 365 Days of Art Challenge

It's June!!! Where is the time going? I think it goes by faster every year! We need to be sure we are taking time to smell the roses along the way! This week has been a struggle for me. I've been sick most of the week, but have managed to get a bit of sewing done and played with more digital manipulation of photographs. 


Being sick, it was easier to lay in bed and play with my tablet, than to get out my sketchbook and draw. I went through several tutorials (again) for Photoshop Elements. With step-by-step instructions, one would think the images would end up like the tutorial.Not me - some I wasn't even close to the results the tutorial showed! Lol!! I did figure out enough to manipulate the following photos into something I thought was interesting. 

Rosebud overlaying century plant. It was difficult to control the fading of the rosebud to achieve
the affect I wanted. Too much of the rosebud disappeared when I tried make it more transparent.
I like the century plant leaves and debris in the center showing through the rosebud.

My original photos of the rosebud and century plant. 


Striped red/yellow rose on top of geranium leaves. I like the green geranium leaf showing through
the bottom of the faded rose. I can see using this photo as a place to start a mixed-media project. 

The original photos of the geranium leaves and the striped rose.

Vegetables rippled, warped and re-colored provides the base for the bunch of tiny purple flowers and a orange rose. This is my favorite photo. I definitely want to print this and use it for a mixed-media painting, or possibly on fabric for an art quilt. 


These are the original photos of the purple flowers, the orange rose, and a pot of vegetables that I used to create the above photo collage.

I learn more each time I use Photoshop Elements ( (or stumble my way through it). Maybe one of these days, it will actually start making sense! Lol! It's fun to play and manipulate photos to create new ideas, textures, and shapes.


Monday, March 31, 2014

Book Club - Mixed-Media Self-Portraits continued

Mixed-Media Self-Portraits: Inspiration & Techniques
by Cate Caulacos Prato
The book club started by Deb Prewitt of Blue Twig Studio continued reading the next chapter of Cate Caulacos Prato's Mixed-Media Self-Portraits: Inspiration and Techniques this month. (See review of the first chapter at Blue Twig Studio's blog here and my blog here.)

The second chapter has focused on "Knowing Thyself: taking the first step toward a self-portrait."  It started with a couple of exercises to understand yourself better - i.e. What color are you? Who lives here? Answering questions about your what you have surrounded yourself with in your home. And lastly, who would you like to be? Children have no problem drawing themselves as who they imagine they are - a princess, a pirate, etc. Who do you imagine yourself to be?

She follows this up with self-portrait exercises - studying yourself in a mirror and getting to know your face.  I like the quote by Leonardo Da Vinci

"The mirror, above all - the mirror is our teacher." 

I love the directions given for drawing the eye. I think the eye is the hardest part of the face to capture. I've done many portraits in colored pencil and oils over the years and it's always the eye that is the hardest part of the face. Without that, the person just doesn't look right. Her directions are great for how to capture the eye!

She also discussed digital portraits, caricatures, gettting started and putting it all together. Several artists shared their thoughts and journey to create self-portraits. Not all portrait examples contained faces. I think that relieves some of the pressure to draw a face that actually looks like you. Portraiture is difficult for most people, and I think that's why doing a self-portrait can be very scary. This chapter helps with easing some of those fears, while giving many helpful ideas to know yourself better and suggestions for creating a self-portrait.

The last several days, I played with a few different photo-editing software to create several digital self-portraits. I used Adobe Photoshop Elements, Pixlr Express, Paper Camera, and FotoRus. They all have slightly different features. I had lots of fun playing. I created a photo collage of some of the self-portraits I had the most fun creating and/or liked the best.

Digital Self-Portrait collage created in FotoRus with InstaMag.
Clockwise, starting in the lower right-hand corner: I used Adobe Photoshop Elements (PE) to crop a photo and enhance the color to create "Just Me, Myself, and I". I further edited this in PE, changing the coloration to create "Bold". I thought the purple skin and green clothing made for a bright, bold portrait. Again in PE, I changed the colors to make a monochromatic blue portrait, then rippled it and used the gradient to create "Fading Away".  In "Unadorned", I took the original self-portrait in PE and turned it into a black and white portrait with warm highlights.  "Sketch" was created in Paper Camera.  In "The All-Seeing Eye", Pixlr Express created 3 slightly different facial views, each a different color, which I imported into Paper Camera for the neon colors. Finally, I used FotoRus with Pip (picture in a picture) to center the eyes of the portrait in a drop of water. "Electric! (or eclectic?)" was created in Pixlr Express using special effects and overlays.  Finally, the blue portrait created in PE was imported into FotoRus Pip to make "Auntie Em, Auntie Em". The bubble reminded of the Wizard of Oz, when Dorothy is calling for Auntie Em in the crystal ball while locked in the room by the Wicked Witch of the West.  

I created a few other digital self-portraits besides the ones shown here. I had so much fun playing with the different effects to see how I could manipulate the portrait. Another great thing about working digitally is I could delete anything I didn't like!! Lol! Working digitally also gave me ideas I would like to try on paper, in paint, or with fabric. 

This chapter has been inspiring to me to create self-portraits and not feel so self-conscious about it. I want to experiment and play now!


Thursday, March 27, 2014

Rippling and Warping Photos

I decided to play with Adobe Photoshop Elements this week. I've been struggling to learn how to use this program (a guide book would sure be helpful!). It's a great program, but I don't find it extremely user friendly. I'm determined to learn how to use the program in my lifetime (it will probably take me that long, too, especially since they update the program and change some of the filters and how to get to them periodically!).

The two main things I played with this week are "ripple", which creates ripples of various frequencies and width in the photo, and "warped", which lays a grid over the photo and allows you to move the grid points around creating a warped grid. I played with four different photos this week. One is a flower photo I took at the Phoenix Zoo, another is a drawing I created (Week 7 of 365 Days of Art Challenge) from a photo of autumn leaves I took in Ohio last year, a third is a sunset last fall, and the fourth is from a photo of a pot of vegetables I cooked to create a chicken pot pie.

Bird of Paradise taken at the Phoenix Zoo. 
Bird of Paradise after it has been rippled and warped in Photoshop Elements.

Autumn Leaves pen,  ink, and colored pencil sketch I did for
Week 7 of the 365 Days of Art Challenge.
Autumn Leaves sketch rippled and warped with a
gradient added in Photoshop Elements.
Autumn Leaves further modified in Paper Camera (another photo
editing application)  using the Neon Cola filter.  I think this
would make an interesting piece of fabric to use in quilting.

Sunset taken in November in Chandler, AZ.
Sunset after it's been rippled and posterized in Photoshop Elements.
Sunset further modified by warping it. I think this would make a
fun piece of fabric for quilting. 

Pot of vegetables cooking to use in a chicken pot pie.
Pot of vegetables first rippled and warped and then adjusted the
color levels to add more red in Photoshop Elements. 
Pot of vegetables further modified by adjusting the
color "curve" values in Photoshop Elements. Another photo that
would make an interesting piece of fabric for quilting.
Pot of vegetables further modified by adjusting the color "curve" values
even more to create a softer color palette. Then a circular gradient was added to create the
 center oval of color.  Hard to believe this started out as a pot of vegetables!

I had fun playing with these photos in Photoshop Elements. I would like to have a much better understanding of layers, how to cut items out of a photo to paste in other photos, etc. I have done these manipulations a couple of times, but only able after watching a tutorial on them. I really struggled with cutting an item out of a photo. Will just keep playing! Thank goodness photos are cheap these days and I don't have to develop them to see the results!